Fort Siloso: History — 1941-1945

1942-1945
The war reached Blakang Mati on 18 January 1942 with a bombing raid. 17 casualties were reported on the island. The reserve gun barrel for Fort Connaught was damaged as was the No.2 6 Inch Gun on Mount Serapong. Some damage was suffered by the Serapong water supply. A second raid occurred on 5 February.
On the night of 8th/9th February, Japanese forces landed on the NW coast of Singapore., and one gun of the Pasir Laba Battery engaged them. The Battery was shelled, dive-bombed and put out of action.
 To make things worse for an attack from land, the guns did not have a lot of HE ammunition. For the big guns, there was only one 15 Inch HE shell on Singapore Island. Being coast artillery, all of the guns had plenty of AP ammunition which is designed to burst through armour plate before exploding inside a warship where it would do most damage.
HE ammunition has a relatively thin casing, and explodes on or near the surface at the point of impact and the shrapnel, or metal splinters from the fragmenting shell, causes tremendous damage to nearby troops and equipment. AP shells have a thick casing, and when used against land targets such as troops or artillery, AP shells bury themselves in the ground before exploding, and do not fragment as much as HE shells. They are not suitable for counter battery or anti-personnel use. Despite this, when the Japanese attacked, all the guns that could, fired on them using what HE shells they had followed by AP. The photograph on the right shows a 9.2-Inch AP Shell fired from Fort Connaught in February 1942 on the advancing Japanese. The shell was recovered from the Pasir Panjang area. It shows how little fragmentation there could be from an AP shell.
Having adequate stocks of HE shells may not have stopped the Japanese taking Singapore, the battle had been lost many years before it started, but Japanese casualties would have been much higher. The battle may have lasted longer and eased the pressure on Burma.
Fort Siloso Joined the battle on 11 February. Its guns engaged Japanese forces along the west coast, and fired of the oil tanks on Pulau Bukom to destroy them before the Japanese took them. The fort was bombed, shelled and mortared. Damage was inflicted on the fort, but its guns kept firing.
Surrender
On the 15 February at 0930, Lt. Gen. Percival presided over a conference at the Combined Battle HQ (the Battlebox). He gave two choices to his senior staff. An immediate counter-attack to attempt to regain the reservoirs and food stocks, or to surrender. After a discussion, it was agreed that a counter-attack was not possible, and that surrender was the only option. Lt. Gen. Percival received a signal from General Wavell which included the words, “When you are satisfied that this [continuing resistance] is no longer possible, I give you discretion to cease resistance”. Lt. Gen. Percival then informed the Governor, Sir Shenton Thomas of the decision to surrender. The Japanese continued to bomb, shelled and mortar the town. Their targets included Pearl’s Hill and the Pender Road/Keppel Harbour area.
At 1130hrs, a delegation carrying a white flag, was sent to the Japanese HQ at the Ford Factory on Bukit Timah Road. It consisted of Brigadier Newbigging, Acting Colonial Secretary Hugh Fraser, and Major Cyril Wild who was a Japanese speaker. After a wait at the Ford Factory, they were met by a Japanese Staff Officer, Colonel Sugita. Lt. Gen. Yamashita would only agree to discuss surrender terms with Lt. Gen. Percival, and it must be at the Ford Factory. The delegation returned to Fort Canning taking with them a large Japanese flag. This was to be raised over the Cathay Building to indicate that Lt. Gen. Percival would accept the arrangements.
The Japanese flag was raised over the Cathay. Two cars then set off for the Ford Factory carrying the Lt. Gen. Percival and his delegation. In the first car was Brigadier Newbigging, Brigadier Torrance and Major Wild. Behind it was the car carrying Lt. Gen. Percival, George Patterson his ADC (Aide de Camp) driving, and a sergeant holding up a white flag. They were met short of the Ford Factory by Colonel Sugita and a tank. Colonel Sugita then accompanied the party to the Ford Factory to meet Lt. Gen. Yamashita.
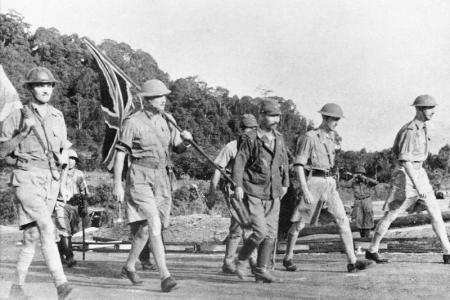
LEFT: The British Delegation arriving at the Ford Factory
Major Wild, Brig. Newbigging, Japanese Soldier, Maj. Sugita, Brig. Torrance, Lt. Gen. Percival
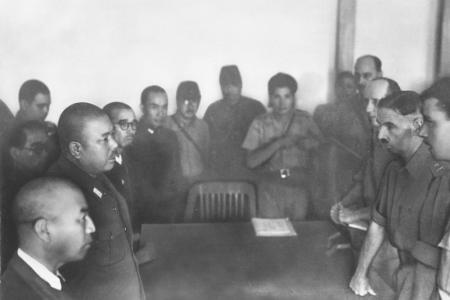
Right: Lt. Gen Yamashita faces Lt. Gen. Percival over the Boardroom table
The delegation met with Lt. Gen. Yamashita in the small Board Room, for a meeting lasting less than an hour. Lt. Gen. Percival had no option but to accept a demand for unconditional surrender. At 18.10hrs the two Commanders signed the surrender document. A cease-fire came into operation at 2030hrs. The war in Malaya and Singapore was over.
 Later that evening, news of the capitulation of the Singapore Garrison reached Blakang Mati. An imprisonment of unspeakable barbarity and which many would not survive was to begin. Fort Siloso and other sites on Blakang Mati would become a Prisoner of War Camp. Some civilians would also find themselves imprisoned at the Fort.
The civilian population of Blakang Mati made good use of the confusion following the British Surrender. They removed what they could from the Central Barrack area and other places before a guard was established.
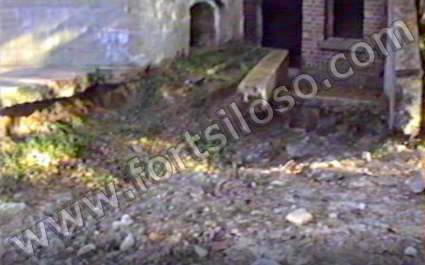
Bomb damage at Fort Siloso was still visible in the 1990s, as can be seen in this 1993 photograph (right) of the long abandoned 7 Inch RML position on Mount Siloso. The last traces of this damage were eliminated when the fort was restored in 1995.
The Japanese Arrive at Siloso
The Japanese, on arrival at Fort Siloso found it to be in a sorry state. The barrack accommodation had been badly damaged by air attack, and the lower barrack accommodation had been destroyed by mortar fire. The Battery Observation Post had also suffered damage from air attack, as had the water supply. Due to British denial demolitions both the 6-inch guns were beyond repair. Sighting and ranging instrumentation had been destroyed. The gun emplacements themselves were damaged by the spiking of the guns. The overhead cover and blast walls of the emplacements were damaged. The magazine was damaged, but not beyond repair. Similarly, the Engine Room had suffered from the denial demolitions.
POW
 On 26th February, the Fortress Commander, two Japanese officers, and an interpreter arrived on Blakang Mati to arrange for the transfer of all POW to camps on Singapore Island. A total of 1,332 British and Indian men were taken to Tanjong Pagar on the ‘Hastings Anderson’. The transfer took two days to complete. The British troops were marched to Changi, and the Indians to Farrer Park.
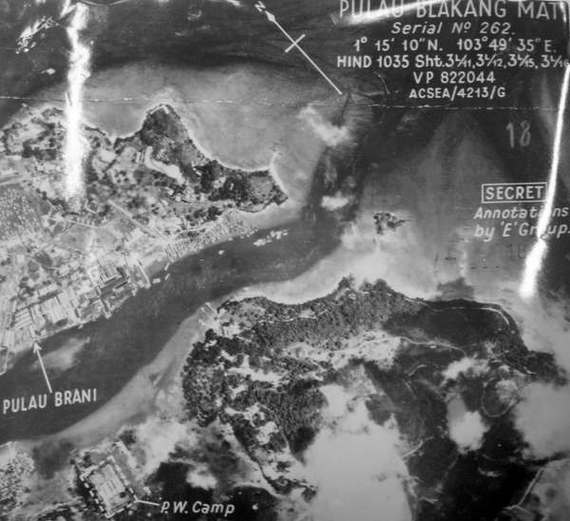
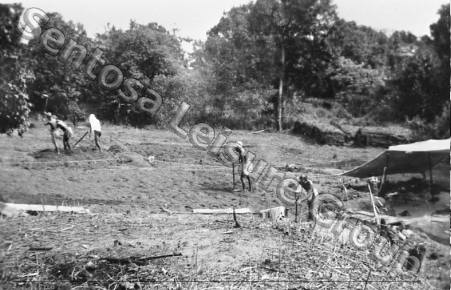
Later as the Japanese required working parties, numbers of men were taken to Blakang Mati to do such work as the occupying force required. It is known that some were housed at Fort Siloso. In later years a small POW camp was constructed on Blakang Mati. The photo on the left is a 1944 reconnaissance photo.
The Japanese failed to repair any of the spiked 6 Inch and 9·2-Inch Guns on Blakang Mati, but did manage to recover and remount the 12 Pounder at OSO (Siloso Point). The Twin 6 Pounders at Berhala Reping were damaged beyond repair. On Singapore island, The Japanese successfully remounted one 6 Inch Gun at Labrador and one at Beting Kusah. They also managed to repair the No.2 15 Inch Gun of the Buona Vista Battery. The repaired guns were never fired in anger.
The British Return
The Japanese surrendered on 15 August 1945, following the dropping of atomic bombs on Hiroshima on 6 August and Nagasaki on the 9 August. Russia had also declared war on Japan on the 8 August, launching a large attack in Manchuria on the 9 August.
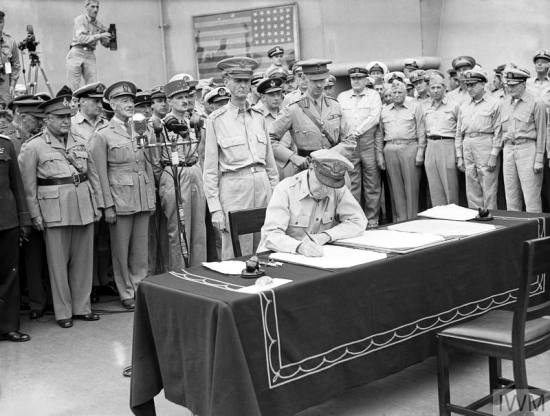 Left: General Douglas MacArthur signs the Japanese Surrender Documents as Supreme Commander Allied Powers on the USS MISSOURI on 2 September 1945.
Photo: Imperial War Museum
Behind General MacArthur stand Lieutenant General Jonathan Wainwright, who surrendered the Philippines, and and Lieutenant General Arthur Percival, who surrendered Singapore. Both gaunt from their time in Japanese captivity.
MacArthur had personally invited both men to attend the Japanese Surrender. At the conclusion of the ceremony, he presented each of them with one of the five pens used in the signing.
After the ceremony, Percival and Wainwright left for the Philippines, again at MacArthur’s invitation. They went to attend the surrender of Japanese forces there on the 3 September. At the ceremony Percival again came face to face with General Yamashita, who was now the Commander of the Japanese forces in the Philippines. Percival later wrote, “As Yamashita entered the room I saw one eyebrow lifted and a look of surprise cross his face — but only for a moment".
Following the formal surrender of Japan on 2nd September, the British returned to Singapore. The Japanese now found themselves POW.
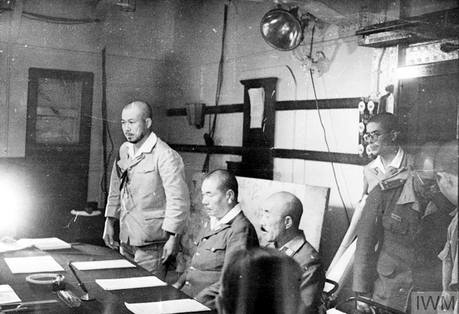
4 September 1945: On board the cruiser the HMS Sussex, flagship of Rear Admiral CS Holland, CB, the terms of agreement for the re-occupation of Singapore were signed.
Lieutenant General Sir Phillip Chritinson, Bart, MBE, CB, DSO, MC, represented Admiral Mountbatten at the signing. The Japanese representatives were General Itagaki and Vice Admiral Fukudome (left).
Photo: Imperial War Museum
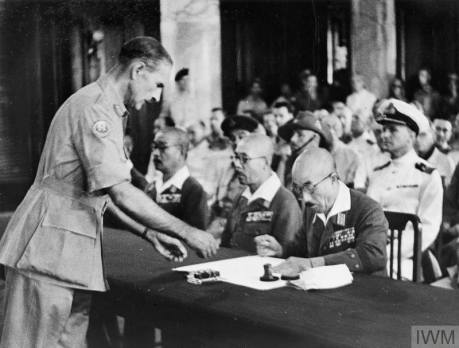
12 September 1945: At the Municipal Buildings. General Seishiro Itagaki signs the document of surrender of the Japanese armies in South East Asia.
Field Marshal Count Hisaichi Terauchi, the Japanese Supreme Commander in South East Asia was unable to attend the ceremony due to illness. He in died June 1946.
Photo: Imperial War Museum
Whilst Blakang Mati Mati have been the preserve of the army pre-war, it was the Royal Navy who took over the island from the Japanese in September 1945. They gave the island the name ‘HMS Sultan 2’. HMS Sultan was the name for the Naval Base at Sembawang, so the Royal Navy just added the number 2 to differentiate them. The Japanese POW found that the treatment they received was altogether more humane than that they gave to their POW throughout Asia.
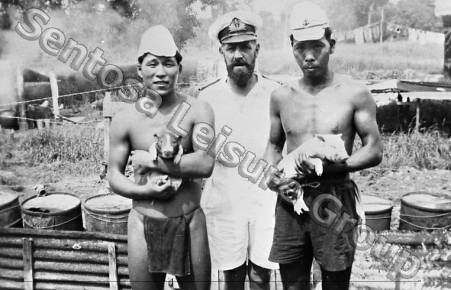
Japanese POW on Blakang Mati.

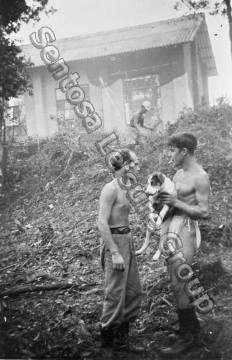 Left: ‘Chief’ Sagawa. The senior Japanese NCO. He lived in the Fort’s Guard Room.
This photo is particularly interesting. The construction behind Sagawa has a roof like the overhead cover for a 6 Inch Gun. Just below his knees is what looks like the horizontal rim of a gun well. Is that a gun barrel on the right of the photo? All in all, He could be standing in front could be the Fort Siloso No.2 6 Inch Gun. I’d like to see a bit more evidence though.
Right: Japanese POW clearing up. This could be Fort Siloso.
Operation ‘Exodus’ was soon put into action. Its aim was to gradually remove all Japanese POW from Singapore, and eventually repatriate them to Japan.
 *NOTE
*NOTE
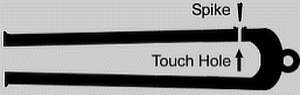
The term ‘spiked’ comes from the days of muzzle loading cannon.
When guns were in danger of being captured, a metal spike was driven into the touch hole at the breech of the gun with a hammer by one of the gunners, who had such spikes hanging from his waist. Once this had been done, gun powder could not be inserted into the touch-hole and used to fire the propellant charge in the chamber, thus rendering the gun useless to the captors.
Since the Japanese attack on Singapore, a myth has developed and has been unfortunately kept alive. This myth is that the Singapore guns faced the wrong way. This is incorrect, the guns did not face the wrong way. As coast artillery, which they were designed for, they were ideally located, and faced the appropriate direction. It is recorded in War Diaries that guns of the Johore, Tekong, Connaught, Changi, Sphinx, Pasir Laba, Labrador and Siloso Batteries took part in the battle for Singapore. The overhead cover of the No.1 Gun at Pasir Laba was removed to enable it to fire on the Japanese landings. Later, part of the overhead cover and side wall of the Labrador Battery was cut away to enable the guns to bear on the advancing Japanese.
It is not recorded anywhere that that I could find, that the Silingsing, Serapong or Beting Kusah Guns took part in the battle. Post-war evidence showed that the concrete canopies at these batteries had not been partly demolished or demolished to enable the guns to bear on the Japanese. The location of these guns meant that the covers to the rear of the guns prevented fire to the west, from where the main Japanese thrust came from. The No. 2 gun of Serapong had had its canopy destroyed by a bomb, but it is still not recorded as turning and firing. It is likely that the top of Mount Serapong would have prevented this. The Serapong and Silingsing guns could have fired towards Kallang, but it seems that they did not.