Fort Siloso: 7 Inch RML Guns & Magazine

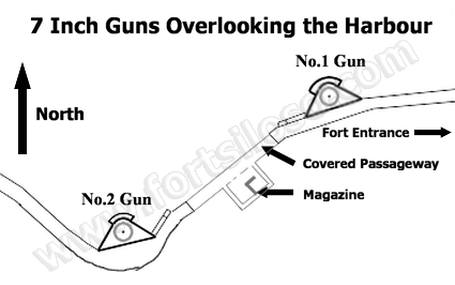
7 Inch RML Emplacements and the Magazine
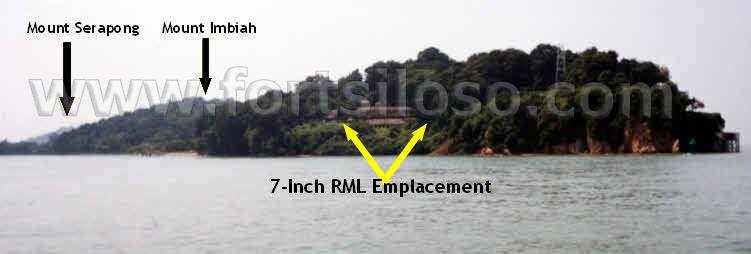
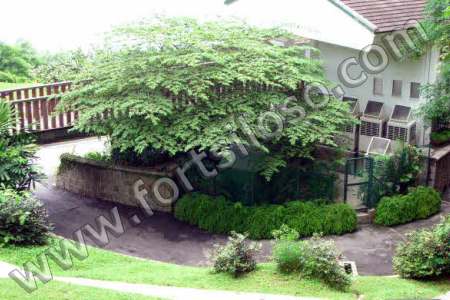
Fort Siloso From Tanjong Berlayar
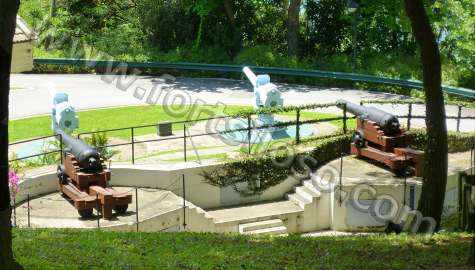
The Emplacement Overlooking The Harbour
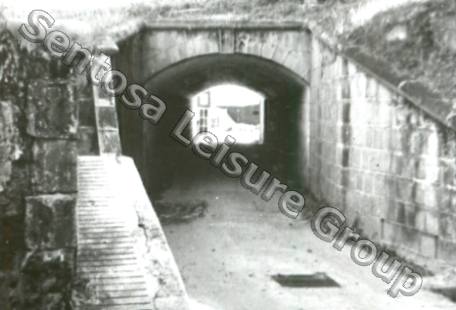
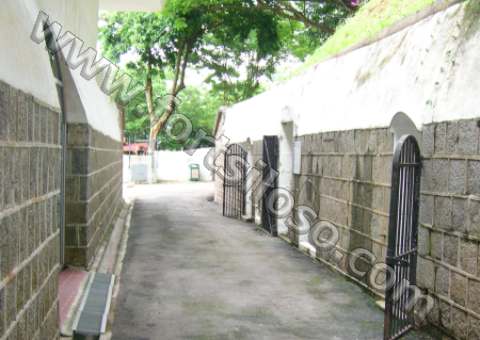
The Covered Passageway Between The Guns
Looking towards the Fort Entrance
When it first became operational, there were three 7 Inch RML Guns emplaced at Fort Siloso. Two of these guns were close to the road entrance to the Fort, and they had a Magazine between and behind them. There was a covered passageway between the guns and the entrance to the magazine was in the passageway. Very little remains of the two gun emplacements near the entrance to the Fort. The Magazine however is intact, but the roof which once covered the passageway has gone. It would seem the have been removed in the early 1950s.
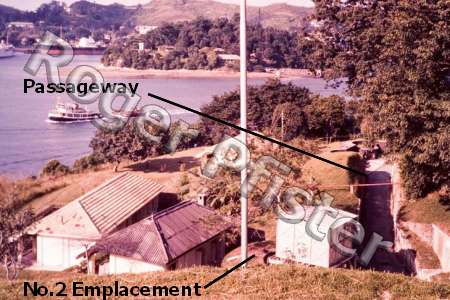
Left: A 1950s view of the No.2 Emplacement with a water tank in it.
Right: A more recent photo with a tree in the emplacement. A fragment of original wall remains.
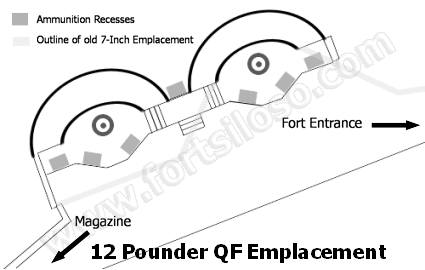
The No.1 Emplacement was rebuilt in 1898 for two 12 Pounder QF Guns.
The 12 Pounders only remained for a few years before being removed. A replica 12 Pounder can be seen in the OSO A.M.T.B. Emplacement. During WWII, the emplacement mounted two Twin Lewis Guns which acted as anti-aircraft armament. This emplacement now displays two 64 Pounder RML Guns.
It is very easy to walk past the remains of the two gun emplacements once opposite the Magazine, and not even realise what was once there.
The Magazine
The Passageway and Magazine Entrance
Looking towards the Entrance to the Fort
The magazine was built to store ammunition for the two 7 Inch RML Guns overlooking the harbour. The Magazine has thick stone walls and its roof is protected by an earth covering which together were designed to withstand the effects of enemy fire. The roof which was once over the passageway between he Magazine and the Gun Emplacement gave cover to the men in the ammunition train supplying the guns with shells and propellant cartridges from the Magazine.
The Magazine entrance is the centre door on the right of the photo. The other doors lead to a passage running around the Magazine. Propellant cartridges were passed from the Magazine to men in the passage, and then taken to the guns. This method ensure that shells and cartridges were kept apart for safety reasons.
On the left of the photo is the entrance to the shop, with the Surrender Chamber above it. The stone wall is original, bur everything else was constructed in later years when the Fort became the gun museum.
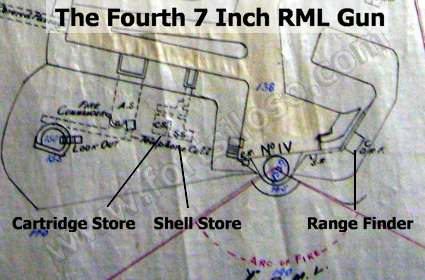
The 3rd & 4th 7 Inch RML Guns
 The third 7 Inch RML Gun was on the top of Mount Siloso, facing South East. The Emplacement had Shell and Cartridge Stores on each side. Substantial remains exist of this gun emplacement and its ancillary buildings.
Just beyond the gun emplacement, the ground falls away steeply thus giving the gun an excellent field of fire, including along the southern coast of Blakang Mati.
A few years later, a fourth 7 Inch RML Gun with a Magazine to the side, was emplaced on the top of Mount Siloso. It was close to where the 64-Pounders once were. This 7 Inch Emplacement and its ancillary buildings were destroyed when the 6 Inch QF Emplacement and Battery Command Post were constructed.